Welcome to the Meetrix Coturn Developer Guide! This guide is designed to assist you in seamlessly integrating Coturn into your AWS environment. Whether you're new to AWS or an experienced developer, you'll discover step-by-step instructions, configuration details, and troubleshooting tips to ensure a smooth experience.
Meetrix Coturn is a robust solution designed to address NAT traversal challenges in real-time communication applications. Leveraging the capabilities of Coturn, Meetrix Coturn offers a seamless experience for applications such as VoIP (Voice over Internet Protocol), online gaming, and peer-to-peer (P2P) communication within the AWS ecosystem.
How to Set up the Coturn AMI on AWS
Quick Video Guide

Prerequisites
Before you get started with the Coturn AMI, ensure you have the following prerequisites:
- Basic knowledge of AWS services, including EC2 instances and CloudFormation.
- An active AWS account with appropriate permissions.
- Enough vCPU lit to create instances (Follow this guide to ensure this)
Launching the AMI
Step 1: Find and Select 'Coturn' AMI
- Log in to your AWS Management Console.
- Navigate to the "Meetrix Coturn" in AWS Marketplace.
Step 2: Initial Setup & Configuration
- Click the "Continue to Subscribe" button.
- After subscribing, you will need to accept the terms and conditions. Click on "Accept Terms" to proceed.
- Please wait for a few minutes while the processing takes place. Once it's completed, click on "Continue to Configuration".
- Select your preferred region in "Configure this software" page and click "Continue to Launch" button.
- From the "Choose Action" dropdown menu in "Launch this software" page, select "Launch CloudFormation" and click "Launch" button.
Create CloudFormation Stack
Step1: Create stack
- Ensure the "Template is ready" radio button is selected under "Prepare template".
- Click "Next".
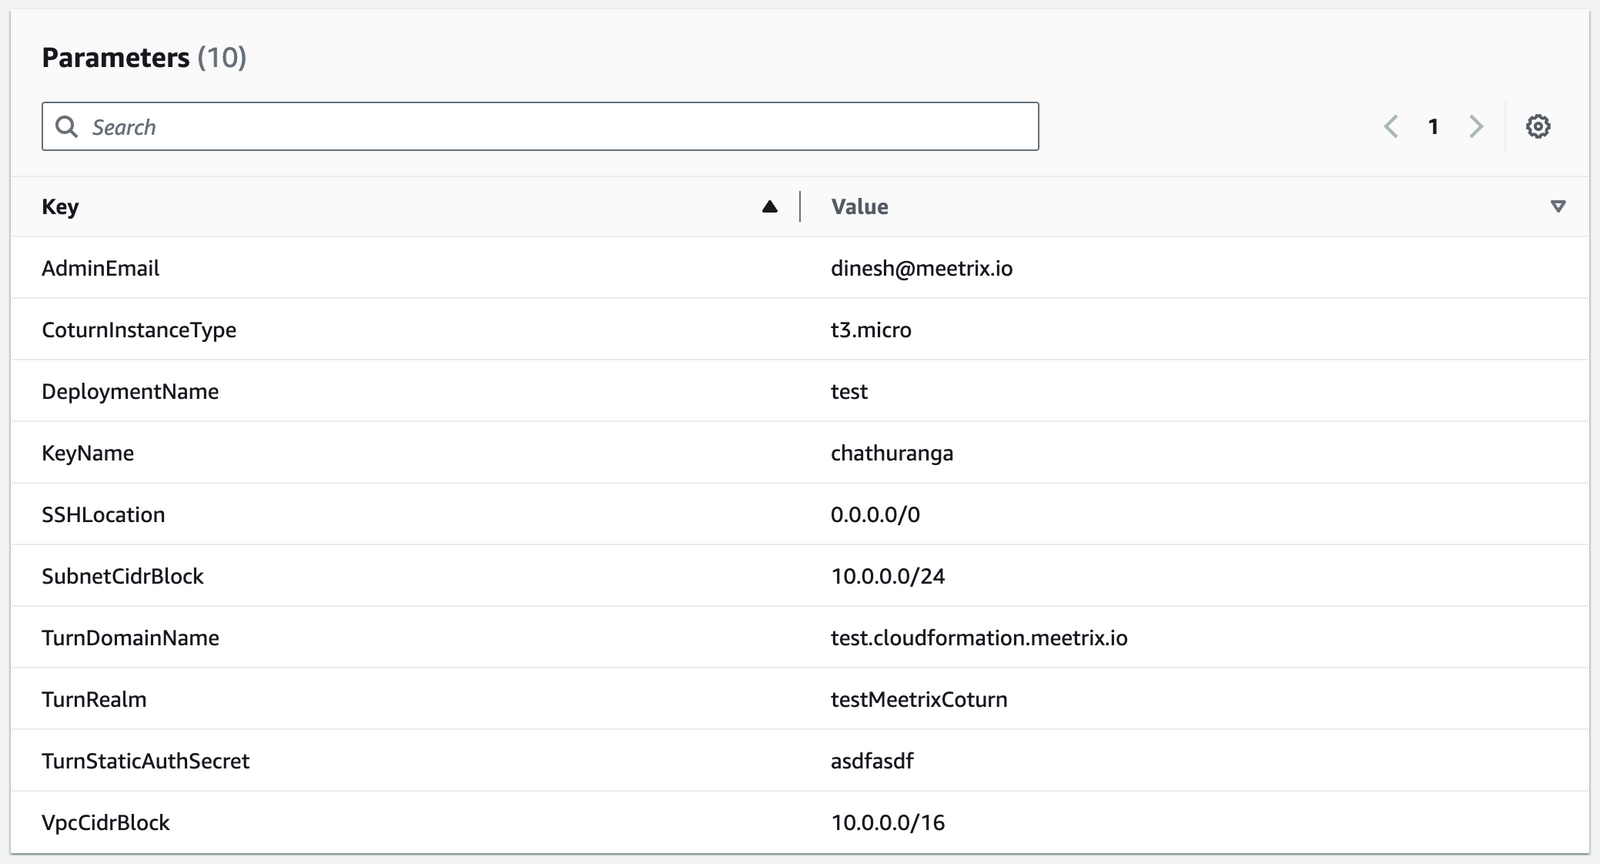
Step2: Specify stack options
| Parameter | Description |
|---|---|
| Stack name | A unique name for your CloudFormation stack. |
| Admin Email | The email address for generating SSL certificates. |
| CoturnInstanceType | The EC2 instance type. (Recommended: t3.micro). |
| DeploymentName | A name for your deployment. |
| keyName | The name of your EC2 key pair for SSH access. |
| SSHLocation | The IP address range for SSH access. Defaults to 0.0.0.0/0. |
| SubnetCidrBlock | The CIDR block for the subnet. Defaults to 10.0.0.0/24. |
| TurnDomainName | Your public domain name. SSL will be set up automatically if the domain is hosted on Route 53. |
| TurnRealm | A descriptive string for your TURN realm (e.g. turn.example.com). |
| TurnStaticAuthSecret | A strong password for TURN authentication. |
| VpcCidrBlock | The CIDR block for the VPC. Defaults to 10.0.0.0/16. |
After filling in the details, click Next.
Step3: Configure stack options
- Under "Stack failure options", select "Roll back all stack resources".
- click "Next".
Step4: Review
- Review and verify the details you've entered.
- Tick the box that says, "I acknowledge that AWS CloudFormation might create IAM resources with custom names".
- Click "Submit".

Afterward, you'll be directed to the CloudFormation stacks page.
You can easily locate the corresponding stack by searching for the stack name you entered in Step 2.
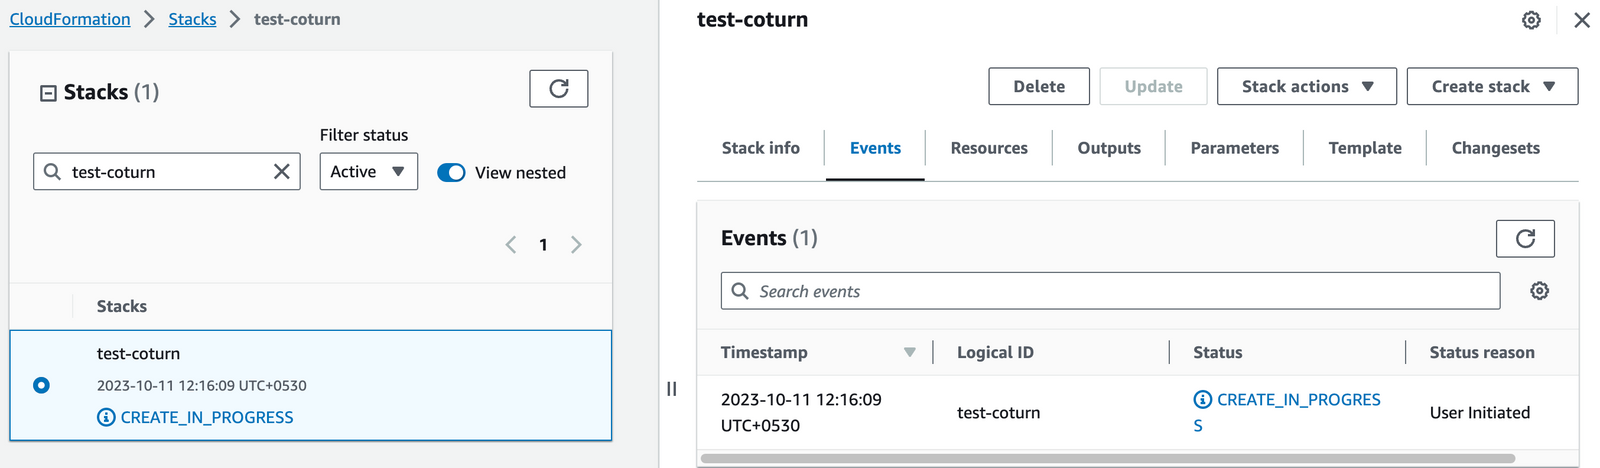
Please wait for 5-10 minutes until the stack has been successfully created. Afterward, you can click the "Refresh" button under the "Stacks" section.

Generate SSL Manually
Coturn will automatically try to setup SSL based on provided domain name, if that domain hosted on Route53. If its unsuccessful then you have to setup SSL manually.
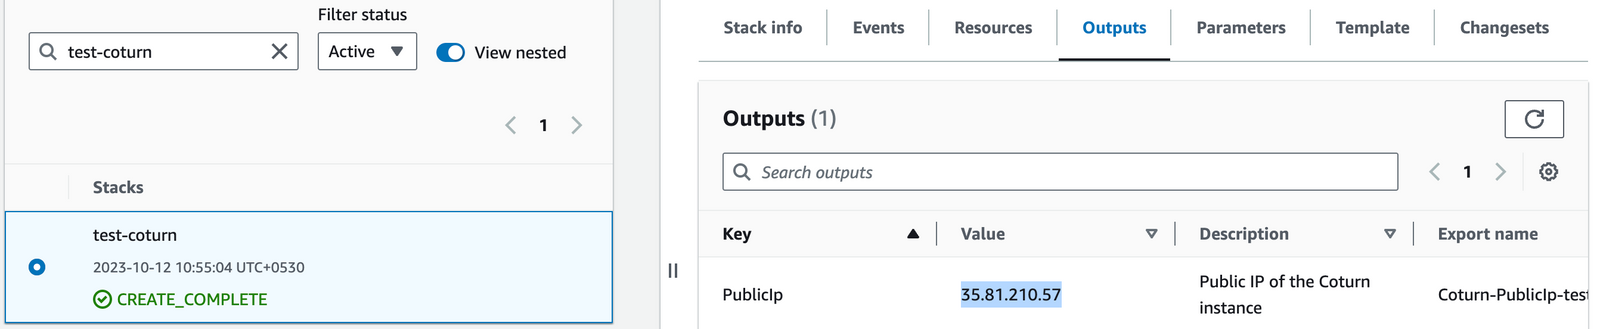
Step1: Copy IP Address
Copy the Public IP address indicated as "PublicIp" in the "Outputs" tab.
Step2: Log in to the server
- Open the terminal and go to the directory where your private key is located.
- Paste the following command into your terminal and press Enter:
ssh -i <your key name> ubuntu @<Public IP address> - Type "yes" and press Enter. This will log you into the server.

Step3: Generate SSL
Method1:
- Paste the following command into your terminal and press Enter:
sudo oot/certificate_generate_dns.shMethod2:
- Copy the "PublicIp" as previously explained in "Step1: Copy IP Address" within the "Set SSL Manually" section.
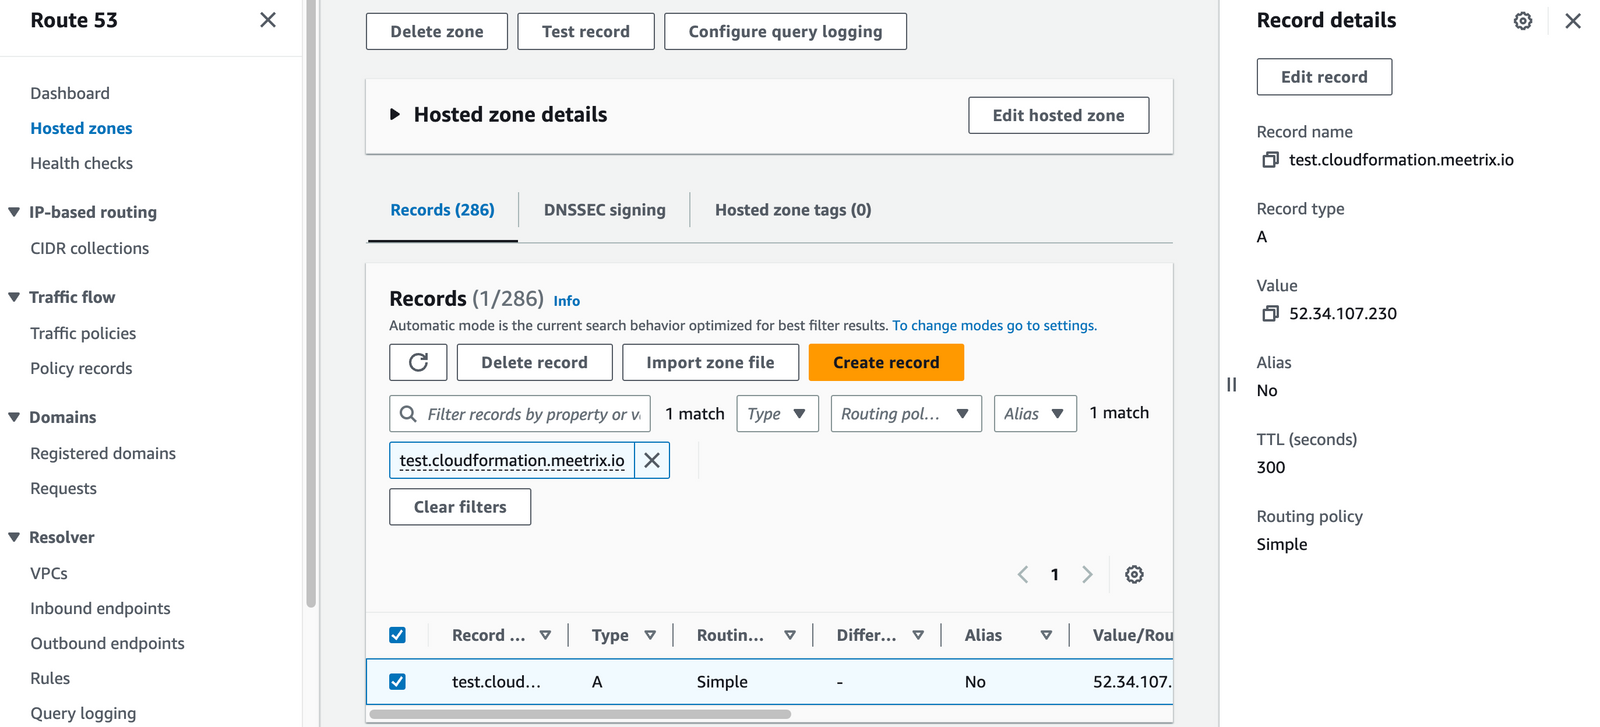
- Go to AWS "Route 53" and navigate to "Hosted Zones".
- From there, select the domain you provided to "TurnDomainName".
- Click "Edit record" in the "Record details" and then paste the copied "PublicIp" into the "value" textbox and click "Save".
- Paste the following command into your terminal and press Enter:
sudo /root/certificate_generate_standalone.shAdmin Email is acquiring for generate SSL certificates.
Testing Coturn on Server
Test for UDP:
- Follow "step1" and "step2" in the "Generate SSL Manually" section to log in to the server.
- Copy the script provided below into the terminal and press Enter to generate a username and a password. Ensure that you replace "myscret" with the "TurnStaticAuthSecret" you provided in "Step2" under the "Create CloudFormation Stack" section.
secret=mysecret && \
time=$(date +%s) && \
expiry=8400 && \
username=$(( $time + $expiry )) &&\
echo username:$username && \
echo password : $(echo -n $username | openssl dgst -binary -sha1 -hmac $secret | openssl base64)
Output of this script would be some thing like following.
username:1525325424
password : YuzkH/Th9BBaRj4ivR03PiCfr+E=- For testing we can use Trickle-Ice testing tool. Go to trickle-ice page and enter following details.
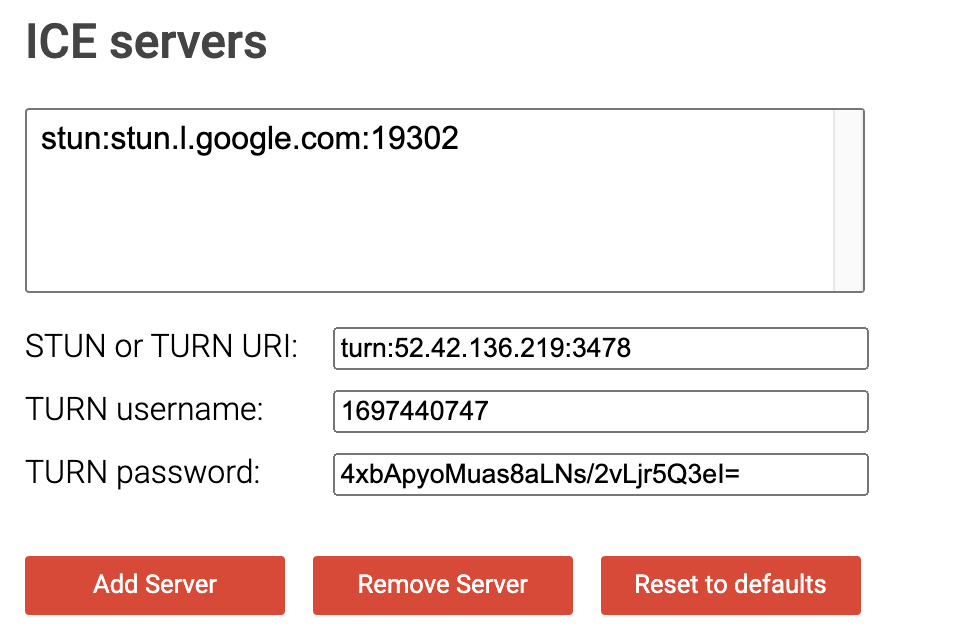
Then click Add Server and then Gather candidates button. If you have done everything correctly, you should see Done as the final result.

If you do not get any response or if you see any error messages, please double check if you have followed this guide as it is.
Test for TCP:
- Follow the instructions in the "Generate SSL Manually" section to set up SSL manually if it is not configured automatically.
- Go to trickle-ice page and enter following details.
STUN or TURN URI : turns:<YOUR_DOMAIN>:443

TURN username: <Generated_username>

TURN password: <Generated_password>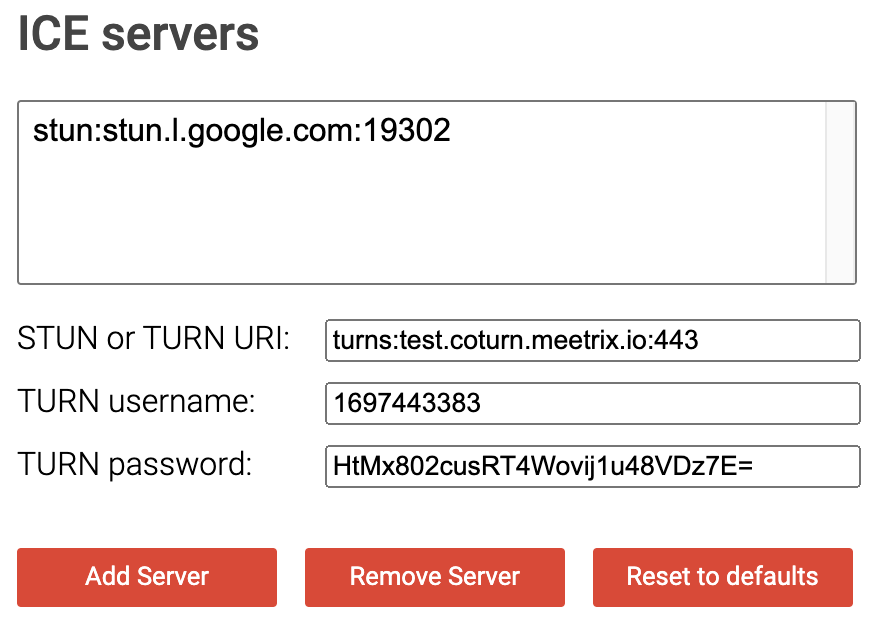
Then click Add Server and then Gather candidates button. If you have done everything correctly, you should see Done as the final result.

If you do not get any response or if you see any error messages, please double check if you have followed this guide as it is.
Shutting Down Coturn
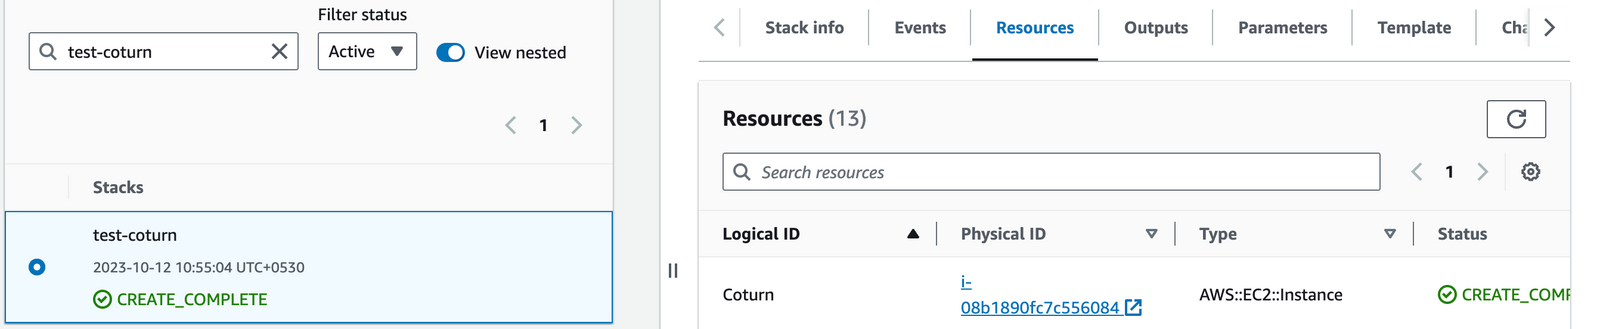
- Click the link labeled "Coturn" in the "Resources" tab to access the EC2 instance, you will be directed to the coturn instance in EC2.
- Select the coturn instance by marking the checkbox and click "Stop instance" from the "Instance state" dropdown. You can restart the instance at your convenience by selecting "Start instance".

Remove Coturn
Delete the stack that has been created in the AWS Management Console under 'CloudFormation Stacks' by clicking the 'Delete' button.
Upgrades
When there is an upgrade, we will update the product with a newer version. You can check the product version in AWS Marketplace. If a newer version is available, you can remove the previous version and launch the product again using the newer version. Remember to backup the necessary server data before removing.
Troubleshoot
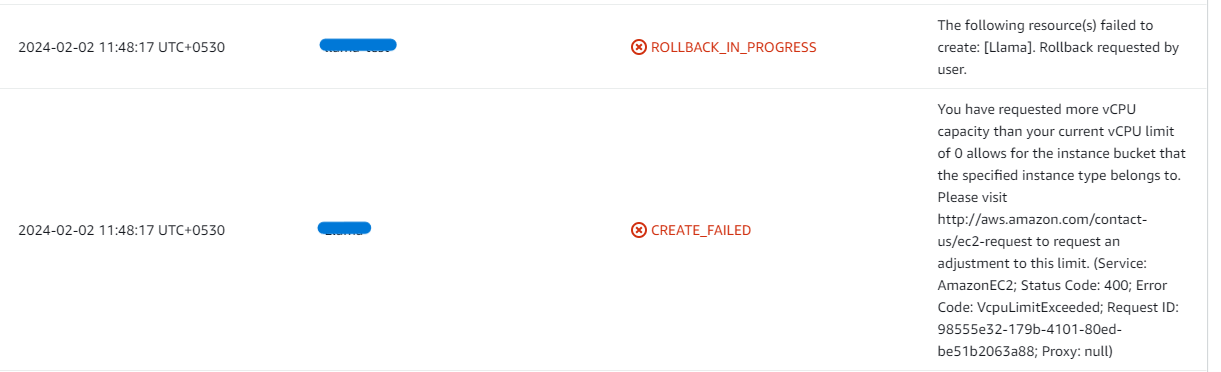
- If you face the following error, please follow this guide to increase vCPU quota.
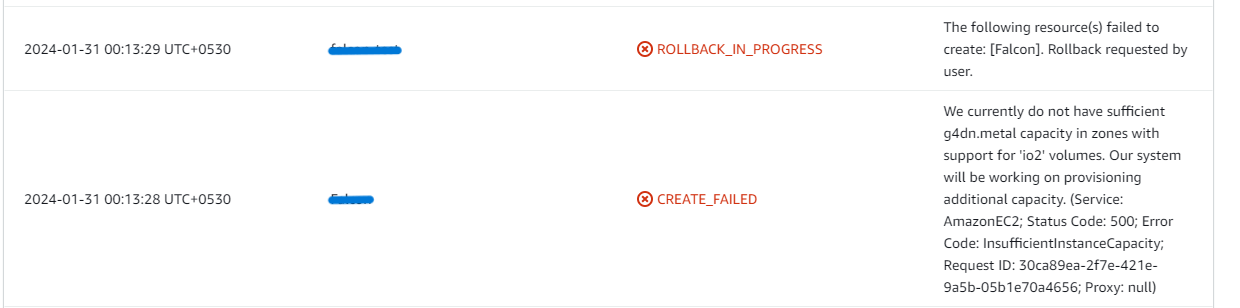
- If you face the following error (do not have sufficient <instance_type> capacity...) while creating the stack, try changing the region or try creating the stack at a later time.
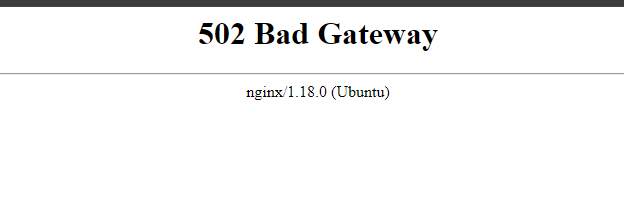
- If you face the below error, when you try to access the API dashboard, please wait 5-10 minutes and then try.
Conclusion
In summary, the Meetrix Coturn Developer Guide empowers developers to seamlessly integrate Coturn into their AWS environments, addressing NAT traversal challenges and boosting the reliability of real-time communication applications like VoIP, online gaming, and peer-to-peer communication. Whether you're just starting out with AWS or have extensive experience, this guide provides the necessary tools—step-by-step instructions, configuration insightsoubleshooting tips—for a successful integration. With Meetrix Coturn, enhance your application's real-time communication capabilities confidently and effectively.
Technical Support
Reach out to Meetrix Support (support@meetrix.io) for assistance with Meetrix Coturn issues.
Frequently Asked Questions
What is Coturn and why is it needed?
Coturn is an open-source implementation of a TURN and STUN server. It's used to facilitate real-time communication (like video and voice calls) by helping devices find each other and communicate, especially when they are behind network address translators (NATs).
Can I use my own domain name?
Yes. Our solution is designed for you to connect your custom domain. The deployment guide provides clear instructions for DNS configuration and SSL setup.
Is my data secure?
Absolutely. The entire environment runs within your own AWS account, giving you full control over your data, network security, and access policies. We also guide you through setting up SSL for encrypted communication.
How do I scale the application?
The deployment is built on scalable AWS infrastructure. You can easily upgrade your EC2 instance type for higher traffic loads. For large-scale deployments, you can run multiple Coturn instances behind a load balancer.
Ready to Deploy a Robust TURN/STUN Server?
Get started in minutes with our pre-configured AMI and ensure reliable real-time communication.
Deploy Coturn from AWS Marketplace